树莓派新机配置
镜像 Ubuntu:https://ubuntu.com/download/raspberry-pi
Pi OS:https://www.raspberrypi.com/software/operating-systems
balena:https://www.balena.io/etcher
更新源 1 2 3 4 5 6 7 8 sudo vim /etc/apt/sources.listdeb http://mirrors.tuna.tsinghua.edu.cn/raspbian/raspbian/ buster main non-free contrib rpi deb-src http://mirrors.tuna.tsinghua.edu.cn/raspbian/raspbian/ buster main non-free contrib rpi sudo vim /etc/apt/sources.list.d/raspi.listdeb http://mirrors.tuna.tsinghua.edu.cn/raspberrypi/ buster main ui
修改时区 Asia => Shanghai
1 sudo dpkg-reconfigure tzdata
vim配置 http://sanzo.top/Default/vim
1 2 3 4 5 6 7 8 9 10 11 12 13 14 set expandtabset softtabstop=2set autoindentset tabstop=2set shiftwidth=2set nusyntax on noremap H ^ noremap L $ noremap J G noremap K gg nnoremap < << nnoremap > >>
静态IP sudo nano /etc/dhcpcd.conf
1 2 3 4 5 6 7 8 9 interface eth0 static ip_address=192.168.31.240/24 static routers=192.168.31.1 static domain_name_servers=192.168.31.1 interface wlan0 static ip_address=192.168.31.242/24 static routers=192.168.31.1 static domain_name_servers=192.168.31.1
sudo reboot
安装包 1 sudo apt install -y lrzsz git proxychains libboost-all-dev samba samba-common aria2 cmake
proxychains 1 2 3 4 sudo vim /etc/proxychains.conf 最后一行改为对应自己的端口 socks5 127.0.0.1 10800
v2ray v2ray下载地址安装包
config.json格式
脚本下载:
1 2 3 4 5 6 7 8 9 10 wget https://raw.githubusercontent.com/v2fly/fhs-install-v2ray/master/install-release.sh sudo bash install-release.sh sudo vim /usr/local/etc/v2ray/config.jsonsudo systemctl enable v2raysudo systemctl start v2ray
安装包下载:
1 2 3 4 5 6 7 8 9 10 11 12 13 14 15 16 17 18 19 20 21 22 23 24 25 unzip v2ray-linux-arm64-v8a.zip [Unit] Description=V2Ray Service Documentation=https://www.v2fly.org/ After=network.target nss-lookup.target [Service] User=nobody CapabilityBoundingSet=CAP_NET_ADMIN CAP_NET_BIND_SERVICE AmbientCapabilities=CAP_NET_ADMIN CAP_NET_BIND_SERVICE NoNewPrivileges=true ExecStart=/home/ubuntu/software/v2ray/v2ray run -config /home/ubuntu/software/v2ray/config.json Restart=on-failure RestartPreventExitStatus=23 [Install] WantedBy=multi-user.target sudo systemctl daemon-reloadsudo systemctl enable v2raysudo systemctl start v2ray
终端代理设置:
1 2 3 4 export ALL_PROXY="socks5://127.0.0.1:7890" export all_proxy="socks5://127.0.0.1:7890" export http_proxy="http://127.0.0.1:7890" export https_proxy="http://127.0.0.1:7890"
zsh https://sanzo.top/Linux/zsh/
git 1 2 3 4 5 6 7 8 9 git config --global user.email "arrangeman@163.com" git config --global user.name "Sanzo00" ssh-keygen -t rsa -C "your_email@example.com" vim .ssh/id_rsa.pub
Docker 1 2 3 4 5 6 7 8 9 10 11 12 13 14 curl -fsSL get.docker.com -o get-docker.sh sudo sh get-docker.sh --mirror Aliyunsudo systemctl enable dockersudo systemctl start dockersudo groupadd dockersudo usermod -aG docker $USER docker run --rm hello-world
support ipv6
https://www.rectcircle.cn/posts/docker-ipv6/#%E8%87%AA%E5%AE%9A%E4%B9%89%E7%BD%91%E7%BB%9C%E6%94%AF%E6%8C%81-ipv6
1 2 3 4 5 6 7 8 docker run -d --name ipv6nat --privileged --network host --restart always -v /var/run/docker.sock:/var/run/docker.sock:ro -v /lib/modules:/lib/modules:ro robbertkl/ipv6nat docker network create my-net-ipv6 --ipv6 --subnet="fd00:1::1/80" --gateway="fd00:1::1"
打印机 docker安装 1 2 3 4 5 docker pull tigerj/cups-airprint docker run -d --restart=always --name=cups --net=host -v /var/run/dbus:/var/run/dbus --device /dev/bus -e CUPSADMIN="ubuntu" -e CUPSPASSWORD="ubuntu@print" tigerj/cups-airprint
手动安装
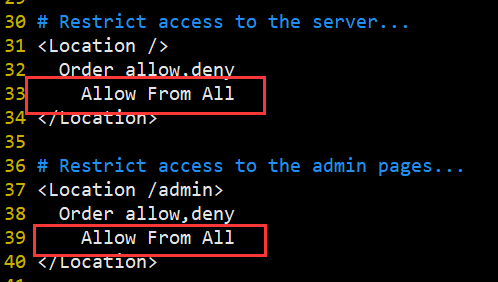
安装CUPS
1 2 3 4 5 sudo proxychains apt install cupssudo vim /etc/cups/cupsd.conf
1 2 sudo service cups restart
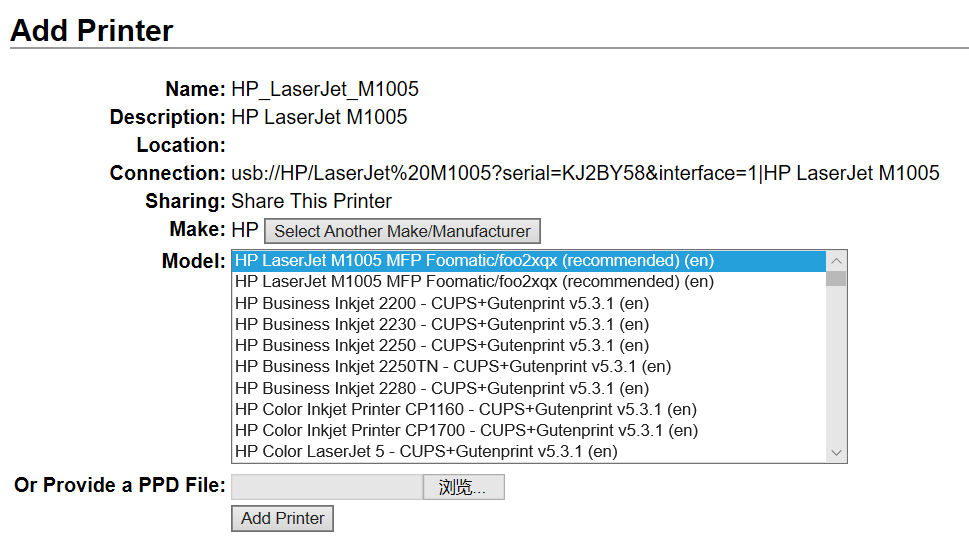
安装打印机驱动
1 2 3 4 5 6 7 8 9 10 11 12 13 14 15 16 wget -O foo2zjs.tar.gz http://foo2zjs.rkkda.com/foo2zjs.tar.gz tar -xzvf foo2zjs.tar.gz cd foo2zjssudo apt install ghostscriptsudo apt install dcmake -j10 sudo make install
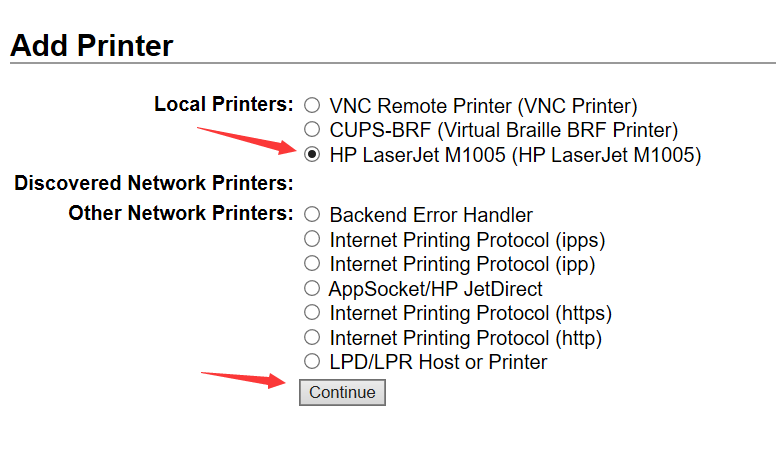
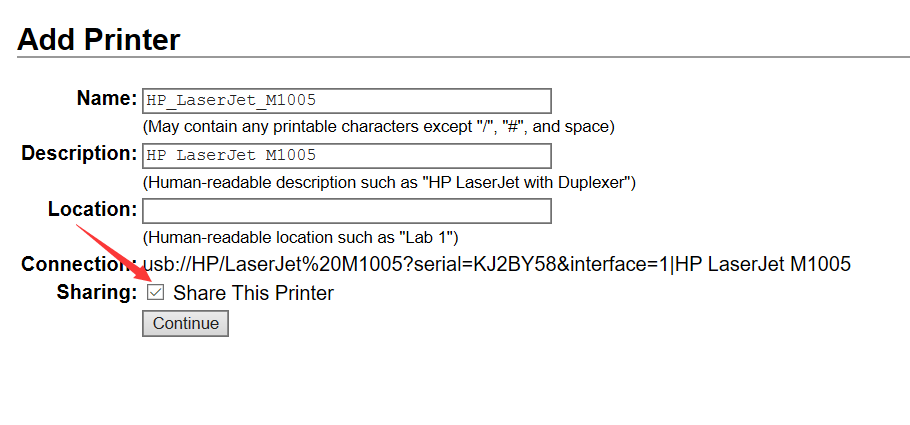
浏览器访问cups的配置页面http://192.168.31.240:631 ,添加对应的打印机。
记得要连接上打印机,而且要用root账号登录。
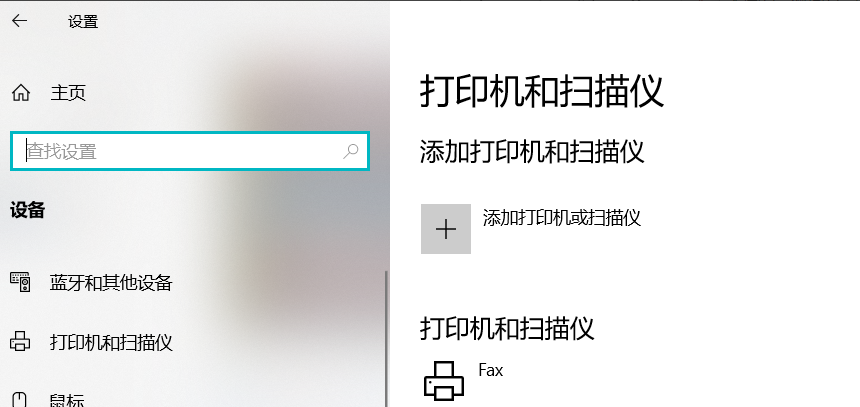
Windows添加打印机
https://192.168.31.240:631/printers/HP_LaserJet_M1005
mac:https://support.apple.com/kb/DL1888?viewlocale=en_US&locale=en_US
挂载硬盘 1 2 3 4 5 6 7 8 9 10 11 12 13 14 sudo fdisk -lsudo vim /etc/fstab/dev/sda1 /home/pi/sanzo ntfs defaults 0 0 mkdir /home/pi/sanzosudo mount -a
Samba 1 2 3 4 5 6 7 8 9 10 11 12 13 14 15 16 17 18 19 20 21 22 23 24 25 26 27 28 29 30 31 32 33 34 35 36 37 38 39 40 41 42 43 44 45 sudo apt install samba samba-commonsudo vim /etc/samba/smb.conf[share] comment = share path = /home/pi/sanzo public = no browseable = yes valid users = root, pi write list = root,pi [public] comment = public path = /home/pi/sanzo/public public = yes browseable = yes writable = yes
配置用户和密码
1 2 3 4 5 6 7 8 9 10 11 12 13 14 15 16 sudo smbpasswd -a pisudo service smbd restart
在我的电脑地址栏输入\192.168.31.240登录即可
清除windows下的net缓冲
1 2 3 4 5 6 net use net use \\192.168.31.240\share /d
若清除缓存后依然自动登录,则需要进入控制面板→用户账户→选择当前账户→管理你的凭据→Windows凭据→删除
qBittorrent https://hub.docker.com/r/linuxserver/qbittorrent
1 2 3 4 5 6 7 8 9 10 11 12 13 14 15 16 17 docker pull linuxserver/qbittorrent:latest docker run -d \ --name=qbittorrent \ -e PUID=1000 \ -e PGID=1000 \ -e TZ=Etc/UTC \ -e WEBUI_PORT=18000 \ -p 18000:18000 \ -p 46881:46881 \ -p 46881:46881/udp \ -v /home/sanzo/disk/data/qbittorrent-config:/config \ -v /home/sanzo/disk/data/private/qbittorrent:/downloads \ --restart unless-stopped \ linuxserver/qbittorrent:latest
在使用内网穿透访问局域网的qbittorrent服务时,需要取消勾选设置=>Web UI=>启动Host header属性验证。
WebDAV 1 2 3 4 5 6 7 docker pull bytemark/webdav docker run --restart always \ -v local-dir:/var/lib/dav/data \ -e AUTH_TYPE=Digest -e USERNAME=User -e PASSWORD=PASSWRD \ --publish port:80 --name webdav \ -e LOCATION=/webdav -d bytemark/webdav
中文乱码
1 2 3 4 5 6 7 8 9 10 11 12 13 14 15 docker exec -it webdav /bin/bash vi conf/conf-enabled/dav.conf DavLockDB "/var/lib/dav/DavLock" Alias /webdav /var/lib/dav/data/ <Directory "/var/lib/dav/data/" > Dav On Options Indexes FollowSymLinks IndexOptions Charset=utf-8 AuthType Digest AuthName "WebDAV" AuthUserFile "/user.passwd"
添加用户
1 htdigest /user.passwd "WebDAV" user
frp内网穿透 frps 1 2 3 4 5 6 7 8 9 10 11 12 vim /root/sanzo/frp/frps.toml [common] bind_port = 60000 vhost_http_port = 60080 vhost_https_port = 60443 dashboard_addr = 0.0.0.0 dashboard_port = 60001 dashboard_user = YOUR_NAME dashboard_pwd = YOUR_PASSWD token = YOUR_TOKEN
1 2 3 4 5 6 7 8 docker pull snowdreamtech/frps docker run --restart=always --net host -d -v /root/sanzo/frp/frps.toml:/etc/frp/frps.toml^C-name frps snowdreamtech/frps YOUR_IP:60001
frpc 1 2 3 4 5 6 7 8 9 10 11 12 13 14 15 16 17 18 19 20 21 22 23 24 25 26 27 28 29 vim /home/sanzo/software/frpc/frpc.toml [common] server_addr = SERVER_IP server_port = 60000 token = SERVER_TOKEN http_proxy = http://127.0.0.1:7890 https_proxy = https://127.0.0.1:7890 [ssh] type = tcplocal_ip = 127.0.0.1 local_port = 22 remote_port = SERVER_PORT [qbt] type = tcplocal_ip = 127.0.0.1 local_port = 18000 remote_port = SERVER_PORT [pi-dashboard] type = tcplocal_ip = 127.0.0.1 local_port = 80 remote_port = SERVER_PORT
1 2 3 4 5 6 docker pull snowdreamtech/frpc docker run --restart=always --network host -d -v /home/sanzo/software/frpc/frpc.toml:/etc/frp/frpc.toml --name frpc snowdreamtech/frpc
Aria2 海盗湾:https://thepiratebay.org/index.html
1337X:https://1337x.to/
LIMETORRENTS:https://www.limetorrents.pro/
TORLOCK:https://www.torlock.com/
ZOOQLE:https://zooqle.com/
YTS:https://yts.mx/
RARBG:https://rarbg.to/
使用容器
https://hub.docker.com/r/p3terx/aria2-pro
1 2 3 4 5 6 7 mkdir aria2-pro && cd aria2-prowget git.io/aria2-pro.yml docker-compose -f aria2-pro.yml up -d
手动安装
1 2 3 4 5 6 7 8 9 sudo apt install -y aria2 mkdir .aria2touch .aria2/aria2.sessionvim .aria2/aria2.config aria2c --conf-path=/home/pi/.aria2/aria2.config
设置开机自启
1 2 3 4 5 6 7 8 9 sudo systemctl daemon-reloadsudo systemctl enable ariasudo systemctl status ariasudo systemctl(start、stop、restart) aria
AriaNg http://ariang.mayswind.net/latest
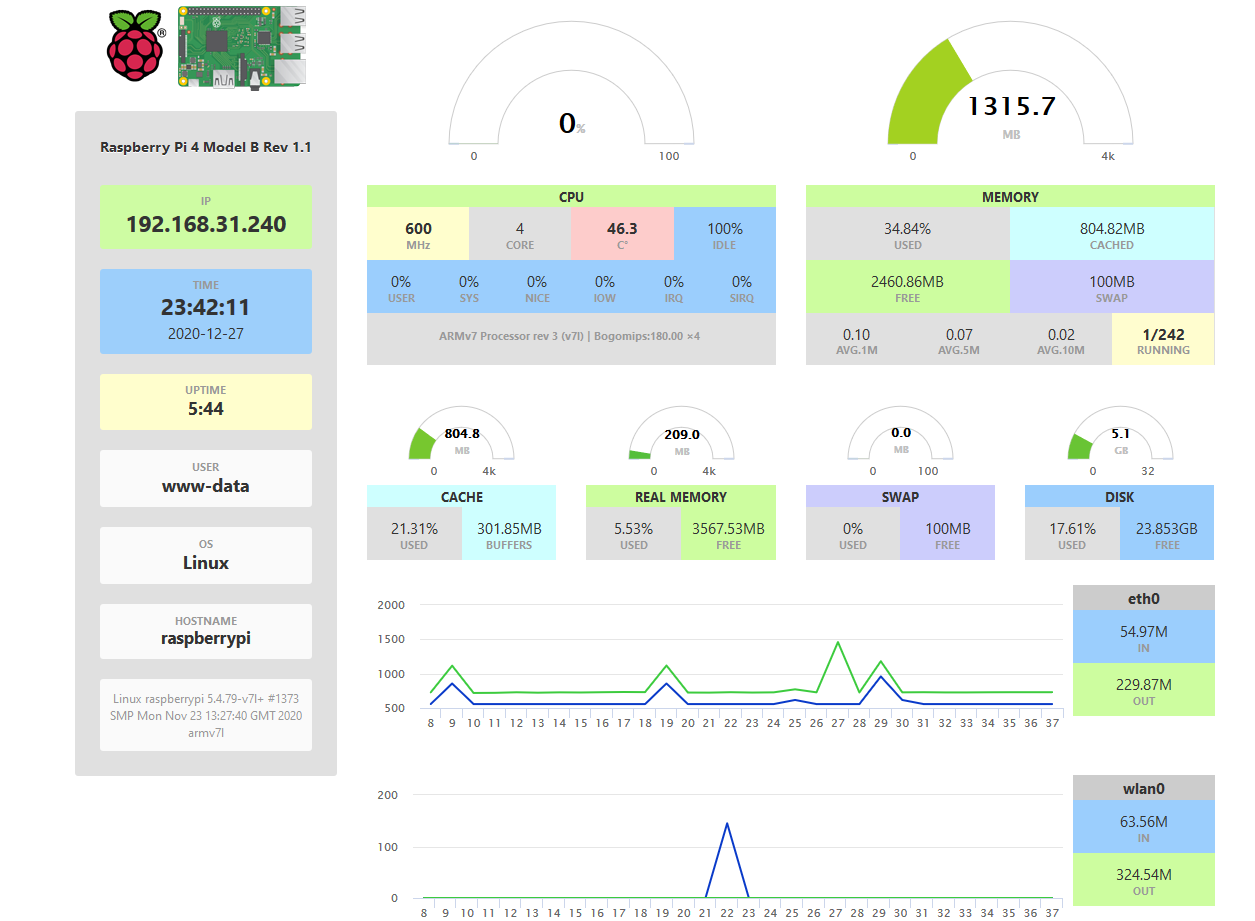
仪表盘 docker 1 https://hub.docker.com/r/ecat/docker-pi-dashboard
手动安装
安装软件包
1 sudo apt-get install nginx php7.3-fpm php7.3-cli php7.3-curl php7.3-gd php7.3-cgi
开启系统服务
1 2 sudo service nginx restartsudo service php7.3-fpm restart
浏览器访问http://树莓派ip
修改配置文件
sudo vim /etc/nginx/sites-available/default
1 2 3 4 5 location / { try_files $uri $uri / =404; }
替换为
1 2 3 4 5 6 7 8 9 10 location / { index index.html index.htm index.php default.html default.htm default.php; } location ~\.php$ { fastcgi_pass unix:/run/php/php7.3-fpm.sock; fastcgi_param SCRIPT_FILENAME $document_root$fastcgi_script_name ; include fastcgi_params; }
重启服务sudo service nginx restart
部署项目
1 2 3 sudo git clone https://github.com/nxez/pi-dashboard.git /var/www/html/pi-dashboardsudo chown -R www-data /var/www/html/pi-dashboard
浏览器访问http://树莓派ip/pi-dashboard
VNC
开启VNC服务
选择Interface Options => VNC,开启VNC服务。
下载VNC客户端
下载地址:realvnc
修改分辨率
如果VNC不能正常访问,可以通过修改树莓派分辨率解决。
选择Display Options => Resolution => Mode4,接着重启机器即可。